Who doesn’t love a nostalgic twist on a beloved childhood treat? Recreating those classic flavors with an indulgent, grown-up spin is what inspired me to bake this Ding Dong Cake—a delicious homage to those iconic snack cakes many of us enjoyed as kids. There’s something about blending childhood favorites with a bit of culinary sophistication that makes for an exciting kitchen adventure, and this recipe does just that.
Last weekend, as a cool breeze hinted at the coming fall, I found myself rummaging through old cookbooks and recipe cards from my grandmother. Amidst the cherished family recipes, I stumbled upon a scribbled note about her love for those little chocolate cakes with the creamy centers. It sparked an idea: Why not transform that tiny delight into a decadent, show-stopping cake? Perfect for any gathering, this recipe takes the familiar comfort of a Ding Dong and elevates it into something spectacularly suited for adults and kids alike.
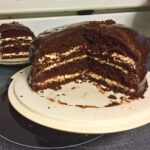
From the moist devil’s food cake base to the rich, fluffy cream filling and the glossy chocolate glaze that envelops the cake, each element promises to transport you back in time while impressing your modern taste buds. The process itself, from mixing the batter to watching guests’ faces light up as they take their first bite, is deeply satisfying. I tweaked the traditional components slightly, such as enhancing the filling with real vanilla and substituting in high-quality chocolate chips for the glaze, which I find gives a richer texture and flavor profile.
Whether you’re looking to recreate a slice of childhood or simply want to indulge in a bit of baking nostalgia, this Ding Dong Cake is sure to be a conversation starter. Its layers of deep chocolate and sweet, creamy filling are a tribute to simpler times, yet sophisticated enough to serve at any chic dinner party. So, preheat your oven and get ready for a delightful baking journey that promises to end with a delicious slice of memory lane!
How to Make Ding Dong Cake:
Ingredients:
- 4 eggs
- 1 (18 1/4 ounce) package devil’s food cake mix
- 1/2 cup vegetable oil
- 1 (3 9/10 ounce) package instant chocolate pudding mix
- 1 1/4 cups water
- 1/4 cup all-purpose flour
- 1/2 cup shortening
- 1 cup white sugar
- 1 cup milk
- 2 teaspoons vanilla extract
- 1/4 cup shortening
- 1 cup chocolate chips
- 3 tablespoons light corn syrup
- 1/2 cup butter
- 2 1/4 tablespoons water
Instructions:
- Preheat your oven to 350°F (175°C). Grease and flour a 10-inch springform pan.
- In a large bowl, mix together the devil’s food cake mix and instant chocolate pudding mix. Then, create a well in the center and add in the eggs, oil, and water. Stir until everything is well combined.
- Pour the batter evenly into the prepared pan and pop it into the oven.
- Bake for about 45 to 50 minutes or until a toothpick inserted into the center comes out clean. Once done, let the cake cool completely on a wire rack before removing it from the pan.
- Now, for the fun part! Slice off a 1-inch thick layer from the top of the cake and set it aside. Scoop out the center of the bottom part, leaving about 1 inch of cake around the sides. You can discard the scooped-out part or save it for snacking later.
- For the filling, whisk together the flour and milk in a saucepan. Cook over medium heat, stirring constantly until it thickens. Set it aside to cool completely.
- Once cooled, beat together the shortening, butter, sugar, and vanilla until it’s nice and fluffy. Then, add in the milk mixture and continue beating for about 4 minutes.
- Spoon this delicious filling into the center of the cake and then place the layer you sliced off earlier back on top.
- Now, let’s make that glaze! Combine the chocolate chips, shortening, corn syrup, and water in a double boiler. Heat it up while stirring frequently until it’s all melted and smooth.
- Pour this warm glaze over the top of the cake, making sure to smooth it over the sides.
- Finally, pop the cake into the fridge until you’re ready to serve it up.
And there you have it, a scrumptious Ding Dong Cake ready to delight your taste buds!
FAQ:
What is a Ding Dong in America?
In America, a Ding Dong is a popular snack cake marketed by Hostess Brands. It consists of a chocolate cake filled with a creamy white center and coated in a thin layer of chocolate. Shaped like a hockey puck, this treat is individually wrapped and enjoyed by people of all ages for its sweet, rich flavor.
Why is it called a ding dong cake?
The name “Ding Dong” is believed to be inspired by the sound of a bell, evoking a sense of whimsy and fun associated with the treat. Interestingly, this snack was originally launched as “Big Wheels” to rival the similar “Ring Ding” by Drake’s Cakes, suggesting that the bell-like names were a nod to their circular shape and catchy, memorable appeal.
Do Ding Dongs have egg?
Yes, Ding Dongs do contain eggs. Eggs are used in the cake batter to help create its moist texture and to bind the ingredients together effectively. Therefore, individuals with egg allergies should consider avoiding this snack.
Do Ding Dongs have milk?
Yes, milk is an ingredient in Ding Dongs, primarily in the creamy filling and also in the chocolate coating. This inclusion contributes to the richness and smooth texture of the cake, making it essential for those with milk allergies to steer clear.
What is the difference between a ding dong and a cupcake?
The main difference between a Ding Dong and a cupcake lies in their structure and presentation. A Ding Dong is a fully enclosed cake with a creamy filling and a chocolate shell, offering a uniform texture and flavor in each bite. Conversely, cupcakes are typically open at the top, often decorated with frosting and can vary greatly in flavors and toppings. Furthermore, cupcakes are usually served without individual wrapping, contrasting with the individually packaged Ding Dong.

Ding Dong Cake
Ingredients
- 4 eggs
- 1 18 1/4 ounce package devil's food cake mix
- 1/2 cup vegetable oil
- 1 3 9/10 ounce package instant chocolate pudding mix
- 1 1/4 cups water
- 1/4 cup all-purpose flour
- 1/2 cup shortening
- 1 cup white sugar
- 1 cup milk
- 2 teaspoons vanilla extract
- 1/4 cup shortening
- 1 cup chocolate chips
- 3 tablespoons light corn syrup
- 1/2 cup butter
- 2 1/4 tablespoons water
Instructions
- First things first, preheat your oven to a toasty 350 degrees F (175 degrees C). While it's warming up, grease and flour a 10-inch springform pan. Grease it up real good!
- Now, in a big ol' bowl, mix together the cake mix and instant pudding. Then, make a little well in the center and pour in those eggs, oil, and water. Give it all a good mix until it's nice and blended. Once it's all mixed up, spread it out evenly into that prepared pan.
- Pop that pan into the oven and let it bake for about 45 to 50 minutes, or until a toothpick poked in the center comes out clean. Once it's done, let it cool completely on a wire rack before you try to take it out of the pan.
- While the cake's cooling, let's work on the filling. Slice off about an inch from the top of the cake and set it aside for later snacking. Then, scoop out the center of the bottom part, leaving about an inch around the edges. You can save the scooped-out cake for later or just munch on it now—it's up to you!
- For the filling, whisk together the flour and milk in a saucepan. Cook it over medium heat, stirring like crazy until it gets nice and thick. Set it aside to cool down completely.
- Once that milk and flour mixture has cooled off, beat together the shortening, butter, sugar, and vanilla until it's light and fluffy. Then, add in the milk mixture and keep beating for about 4 more minutes. Spoon all that creamy goodness into the center of the cake and pop that top layer back on.
- Now for the chocolatey glaze! In a double boiler, melt together the chocolate chips, shortening, corn syrup, and water. Keep stirring until it's all nice and smooth. Then, pour that warm glaze all over the top of the cake and smooth it out over the sides. Stick it in the fridge until you're ready to serve it up.
- Serve up this indulgent treat and watch everyone's eyes light up with joy!