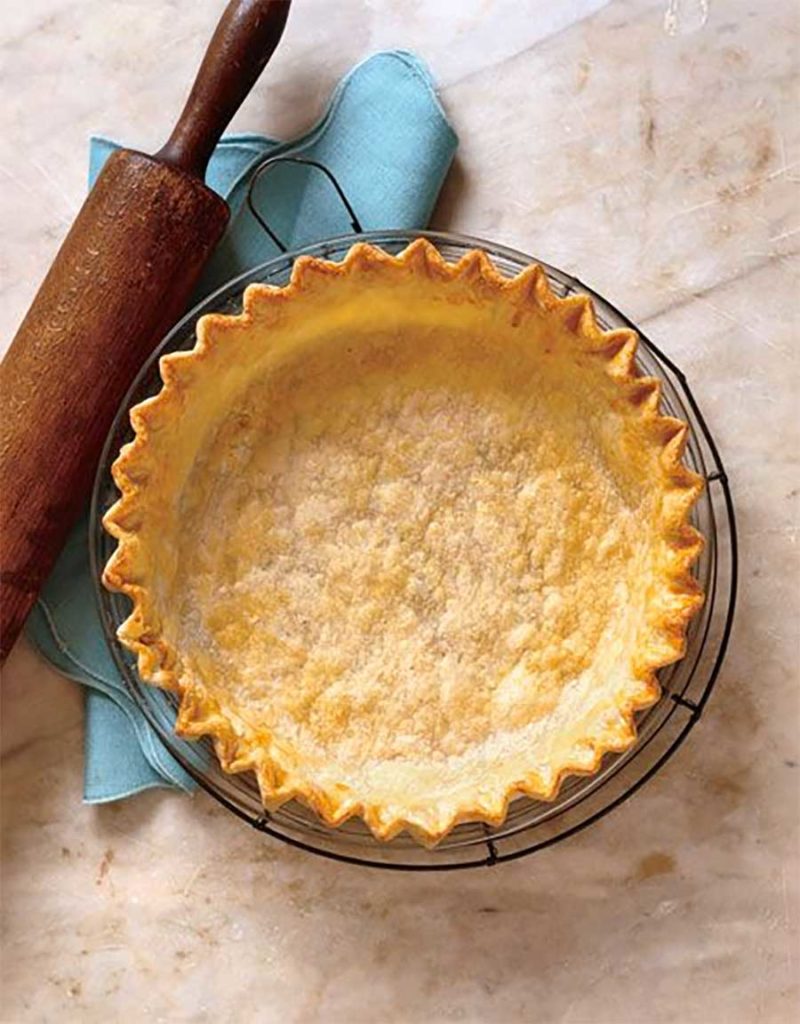
This pie crust recipe comes from my hero, Dorie Greenspan. Her book, “Baking From my Home to Yours” was the first baking book that I purchased and it has opened an endless number of doors for me. Anyways, I adore this crust, not only because it is delicious and tender, but because it makes plenty of pie dough. With some pie crust recipes I feel as though you just have enough to arrange in the pie plate with little room for error. This pie crust gives you plenty of dough to roll out so you never have to worry about not making a perfect circle and the crust not fitting perfectly in the pie plate.
To reiterate some important points about making pie crust… Pie dough likes to be COLD. That means cold fats, cold water, and even cold flour (if you’re an extremists). The cold layers of fat create steam when placed in a hot oven, which is what causes the signature flakiness of the crust. It’s really a must.
Alright, let’s dive right in!
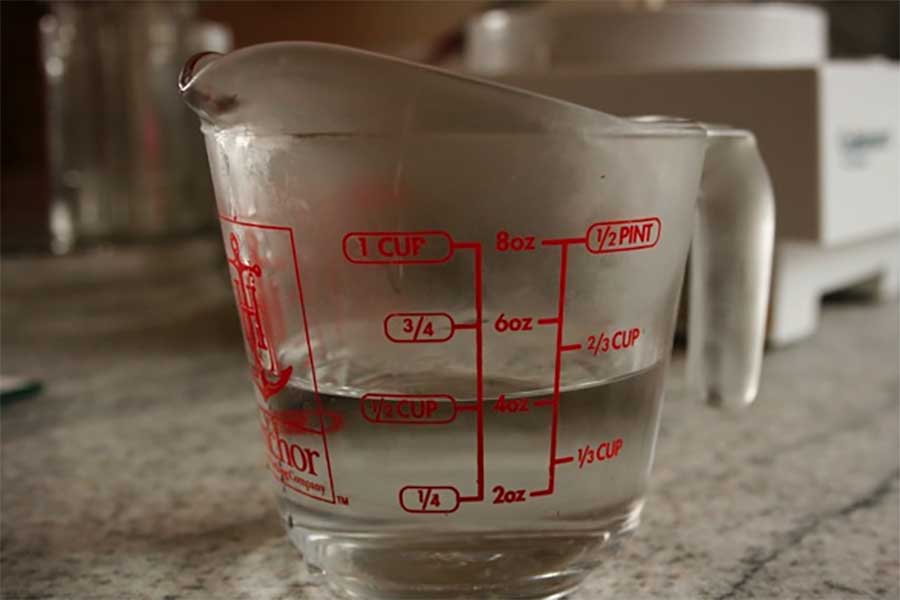
The first thing I always do when I start a pie crust recipe is to measure out some water and place it in the freezer.
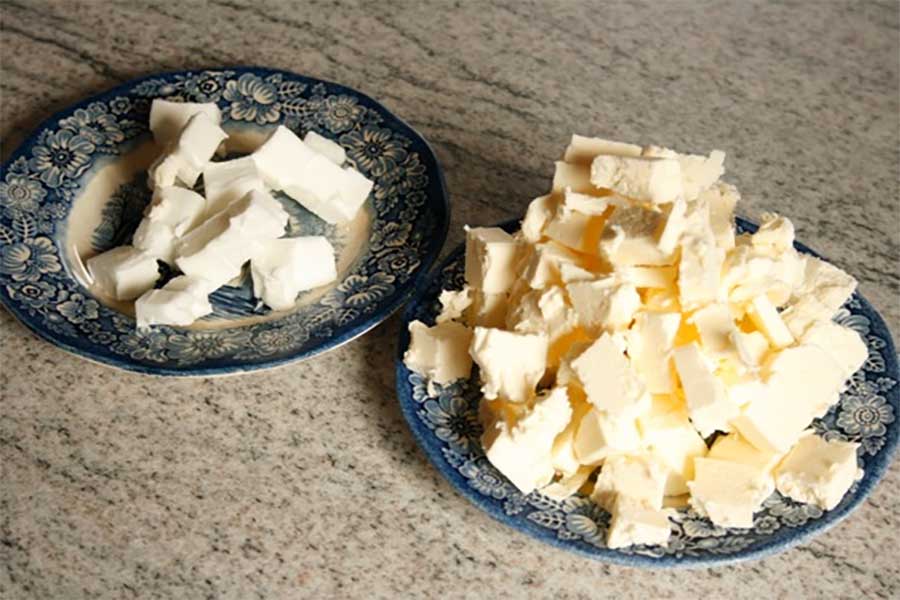
I then move on to prepping the fat cubes. Cut them into nice little squares and place them on a plate, bowl… whatever you can find.
Just pop them in the freezer while you get the dry ingredients mixed. Don’t even have to cover them.
I know what you are thinking. That’s a lot of butter. Yes, yes it is. But! This makes an overindulgence of pie dough, like I said before.
Plus- Mmmmmm butter… Come on!

Mixing the flour is super simple. Go ahead and throw the flour, sugar and salt into the food processor and pulse to combine a few times.
Easy!
Be sure to use the “feeding” cover for your food processor.
You will be pouring the water down the feeding tube, so you’ll want it to land in the center of the mixture,
not in the middle of the blade.
Trust me. It took me an unnecessary amount of gloppy/dry dough to realize this.
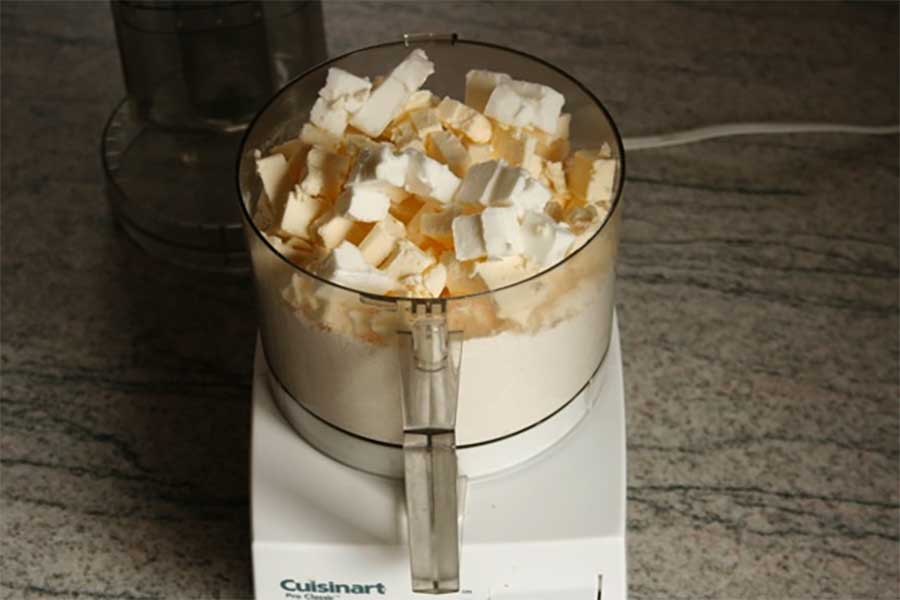
Toss the fat cubes on top and get ready to pulse them in.
Here’s a little heads up- you remember how I said this is a generous pie crust recipe?
Well, it is so generous that it is almost more than my mixer can handle. If you have a 12 cup processor you should be fine.
But all you 7 to 9 cup food processors out there (like myself), you’re going to run into a problem adding the liquid.
So hang in there with me while I try to differentiate what you would do under each circumstance.
No matter what size food processor you have, next you want to put the feeding tube on and pulse about 6 times.
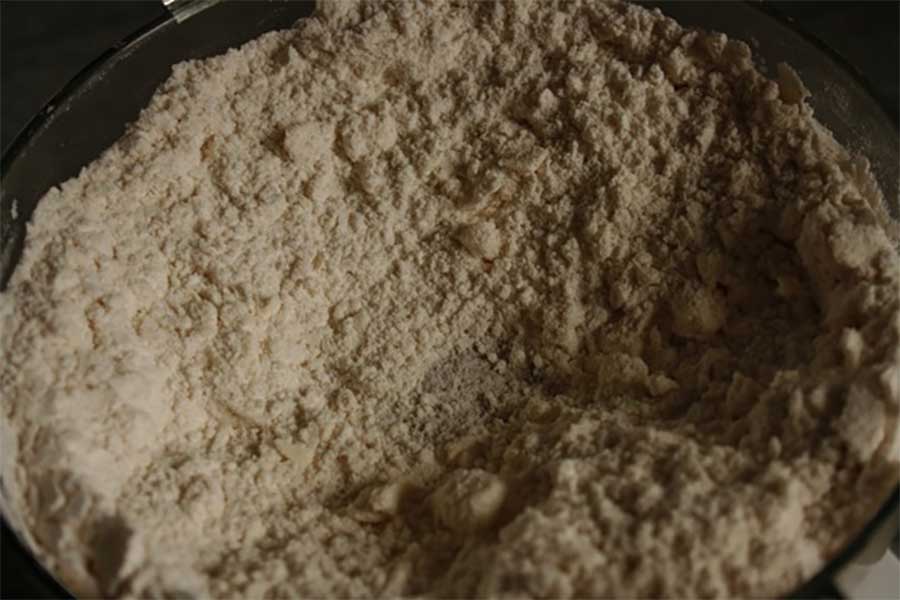
Until the mixture has clumps about the size of peas. It will still be mostly dry.
NOW! This is where the pie crust directions are going to change depending on the size of your processor.
Regardless of size, cover the machine and turn it on to run, and immediately begin drizzling the cold water over the pie dough.
If you have a 12 cup processor OR if you are making a single crust batch with any size processor,
you will soon see the pie dough kind of clump together and roll around in a sort of ball shape.
Once it can hold a shape like that STOP!!
You 7 to 9 cup food processors out there won’t be able to see this.
It sort of will clump together but the ball will never fully develop.
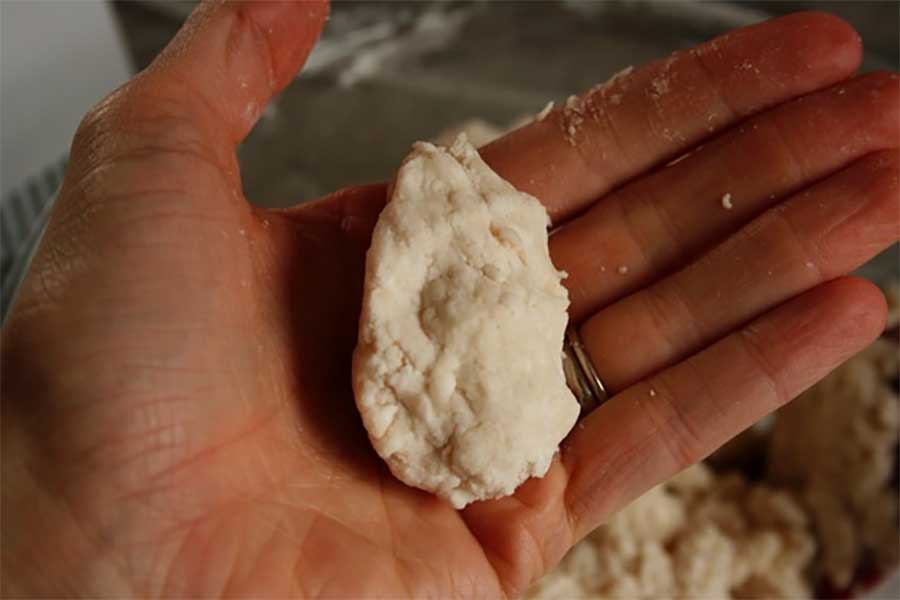
So once the dough starts coming together, stop the machine. Test it by holding a piece of pie dough in your fist.
If it crumbles apart, keep going again for a few more seconds and try again.
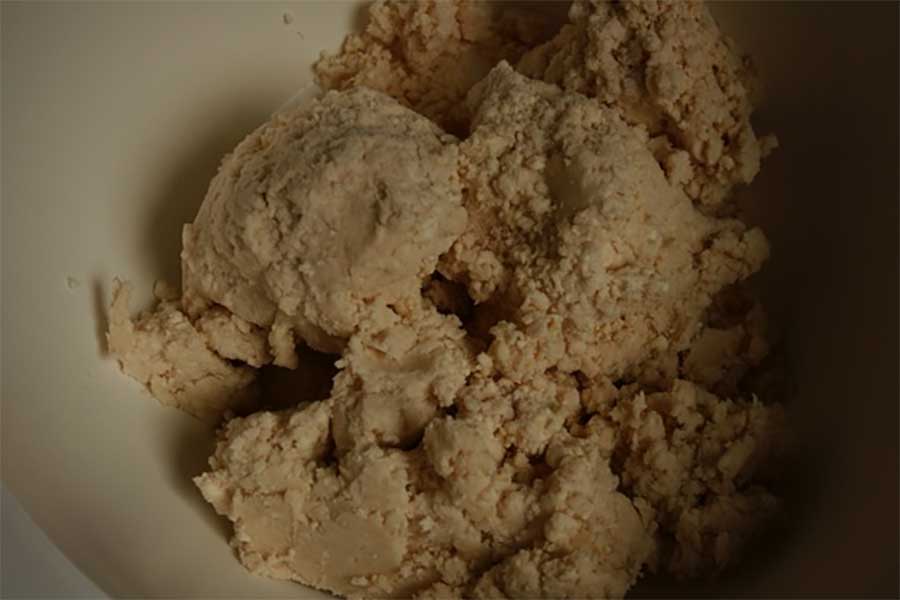
If it stays in one piece then you can dump the whole mixture into a large bowl.
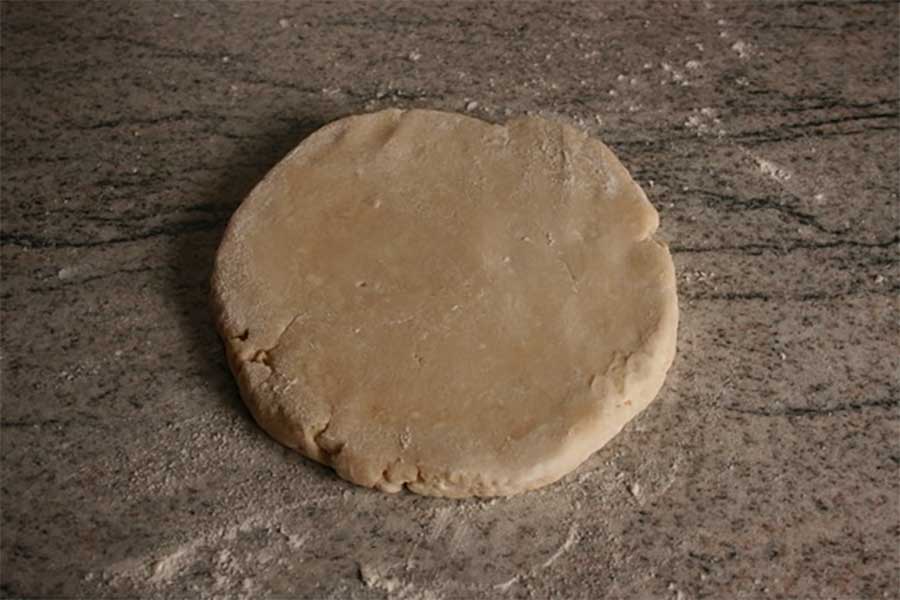
Once this desired state is reached you must then divide the pie dough into two if you made a double crust.
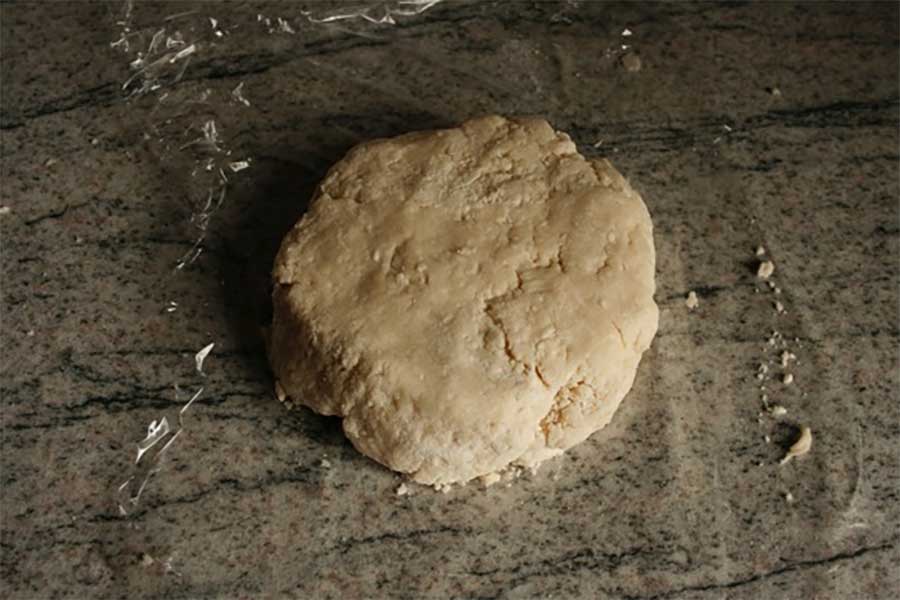
Take two large pieces of plastic wrap and place the balls on top and flatten each into a disc.
Cover tightly and refrigerate for at least 45 minutes.
This is very important. The fat is warm from being worked so it needs to be chilled to create the perfect flaky texture.
NOW. Because I’m super good to you, I am even going to walk you through rolling out the dough : )
This is the type of thing that would be better as a video, but please, bare with me as I try to use words.
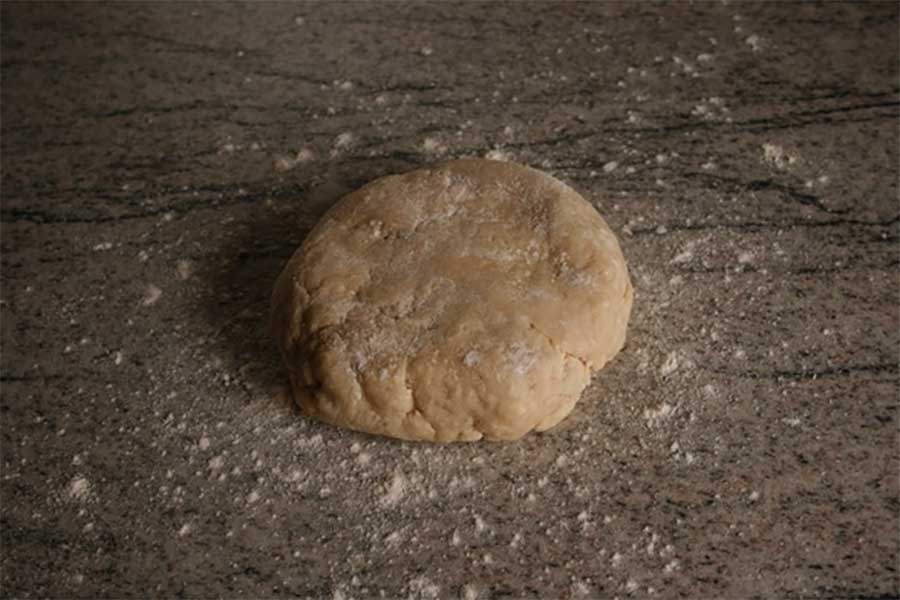
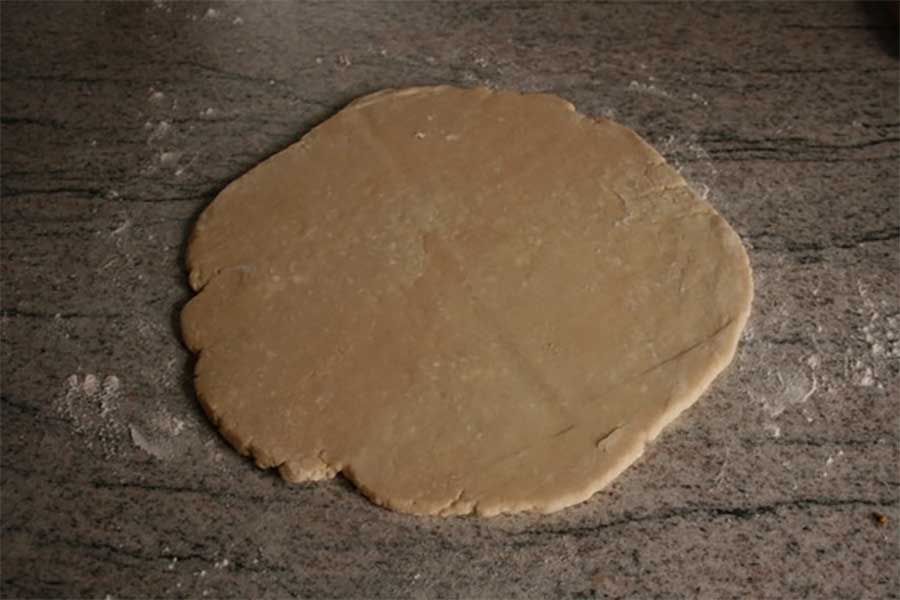
Soooo, begin by flouring a clean work surface. A decent amount of flour… but don’t dump handfuls.
It’s a delicate balance really. You can always add more, but you can’t take it away, so use caution.
Flour the surface, flour the top of the pie dough, and flour the rolling pin.
This is a rough description of how I roll out pie dough.
Hopefully, it makes sense. Here we go:
Go straight from one end to the other, with even pressure, and roll away from you.
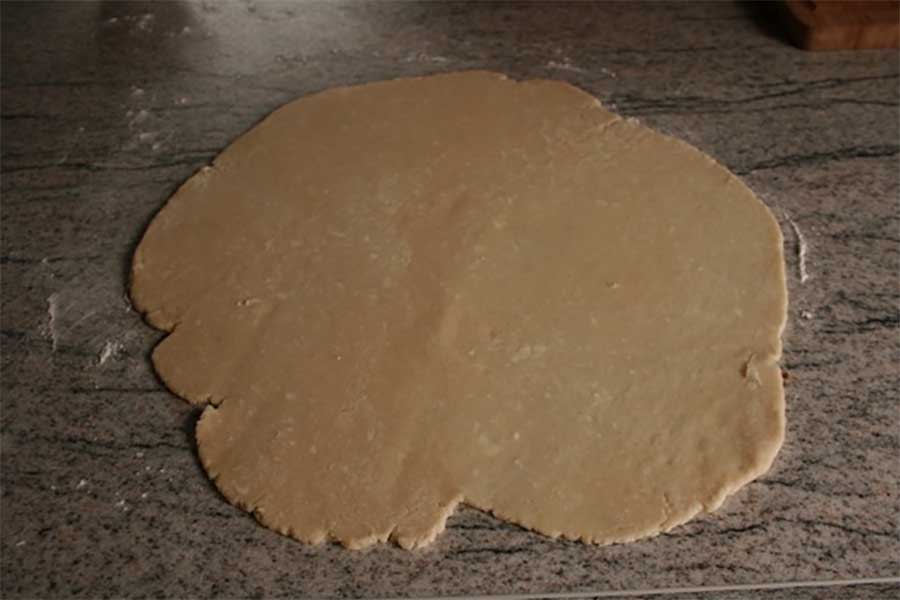
Most sources say to roll once and then gently rotate the dough 90° and then repeat, continuously rolling out the pie crust in that way.
Honestly… I don’t do that. It’s a lot of juggling with the rolling pin. I have a marble rolling pin, so I like to avoid the juggling act.
I simply roll forward, then change angles about 45° to the left, roll forward that way, then go 45° to the right same thing.
Then I rotate. I know that it probably isn’t the simplest thing to visualize…
Basically, I roll it out about every 3 times I roll, then I rotate the dough.
However you decide to do it, it is very important that you keep rotating it. This ensures that it isn’t sticking to the surface.
Do you really want to roll it out and then go to pick it up and have to tear it up to get it off the counter?
No. Didn’t think so. Just do yourself a favor and rotate the dough.
If you find that it is sticking a bit, add a dusting of flour. NOT a handful.
As you can see, I am pretty bad at rolling out a perfect circle…
That’s okay though! This pie crust recipe makes so much pie dough that you have plenty of leftover to trim and make a perfect circle.
Nobody will ever have to know that your pie circle was really a deformed rectangle.
*Tip* I find that sometimes the edges kind of crack into a weird shape while rolling out the pie dough.
I find the best way to avoid total destruction is to reshape the pie dough into a circle each time that you go to rotate it.
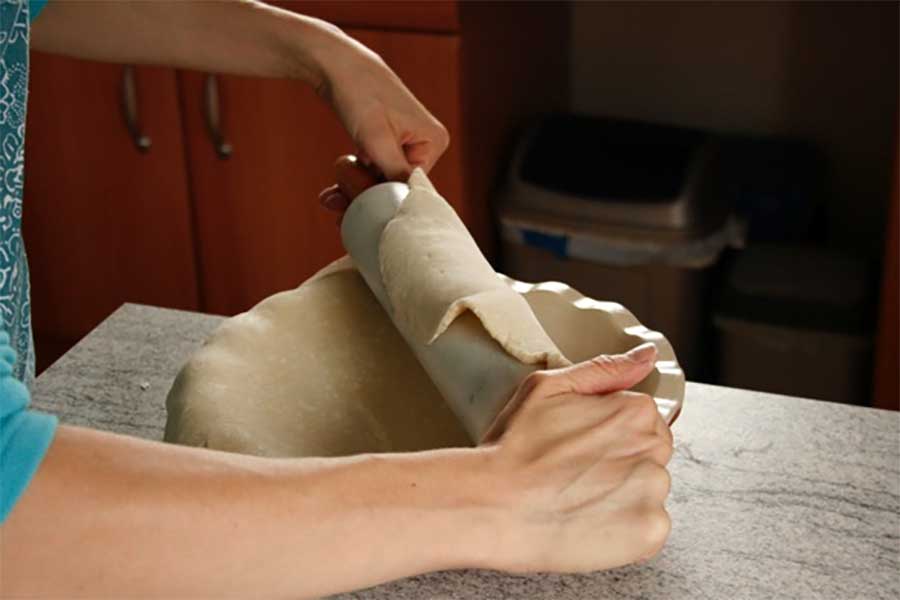
Now, I am going to show you a sequence of shots as to how I personally get the dough into the pie plate without it tearing.
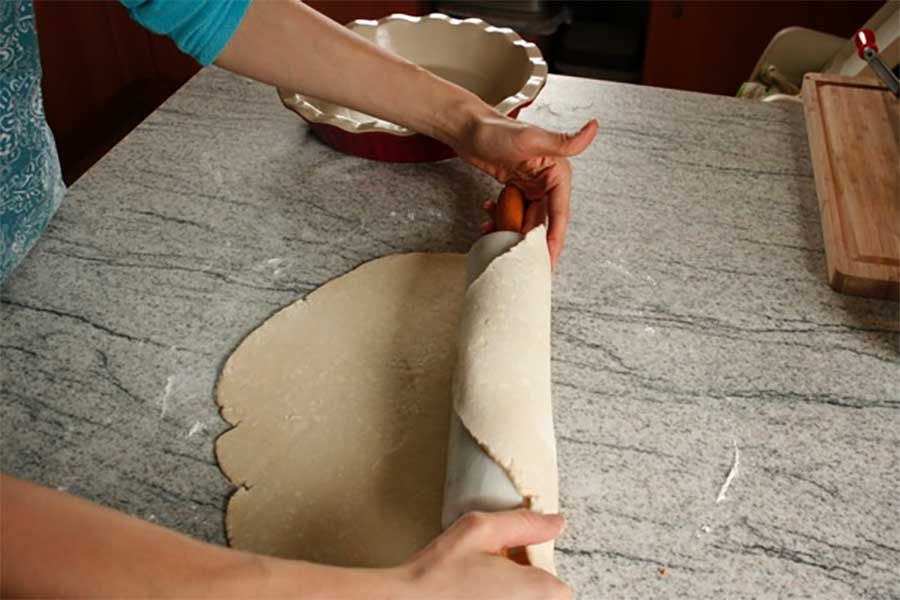
Take your rolling pin and very gently wrap it around the pie crust.
If it begins to stick, add a light dusting of flour across the top.
Wrap it all the way around the pin.
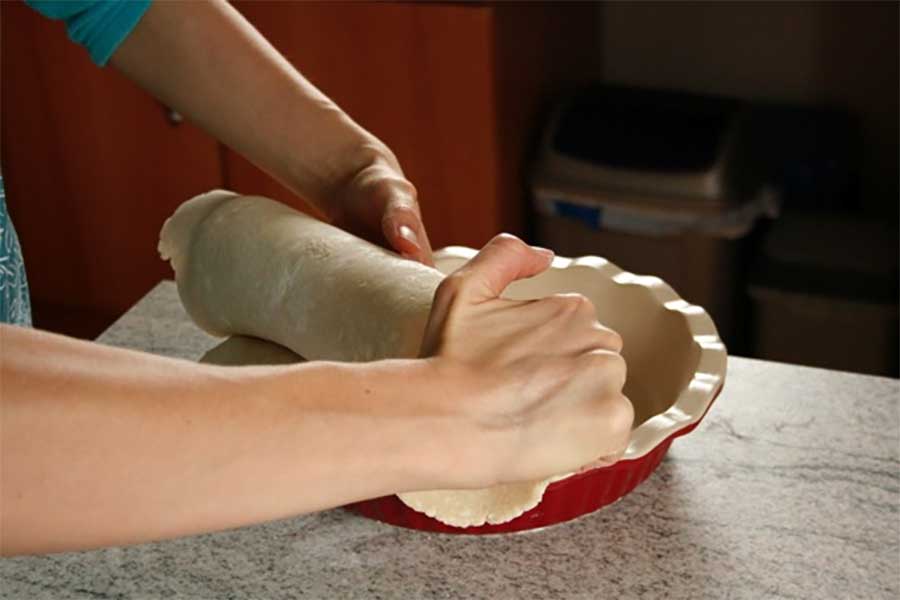
Now drape it over the edge of your buttered pie dish.
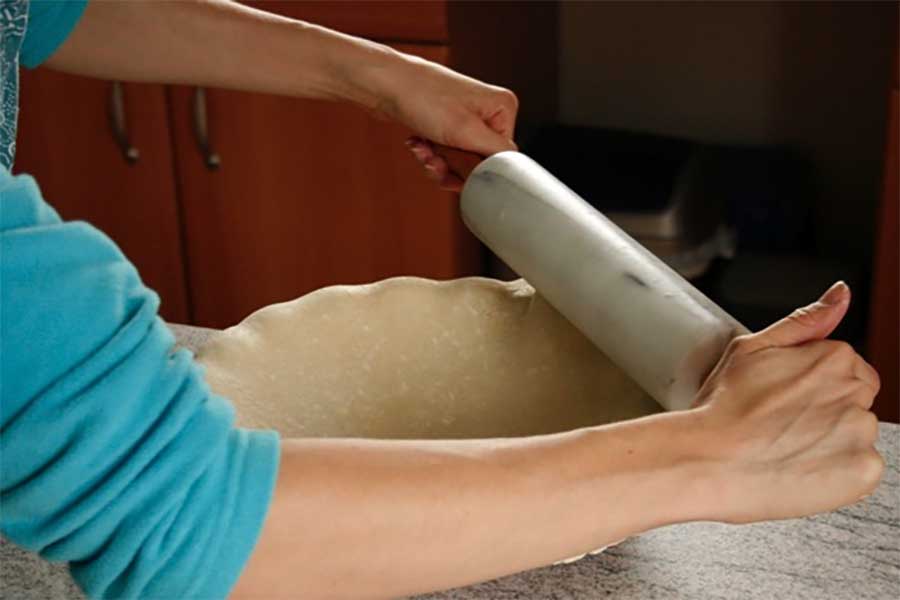
Gently unroll the rolling pin, guiding the dough into place.
If your dough seems strong enough, it may be possible for you to recenter it with your hands afterward.
Notice how I said “seems”. Use your best judgment here. If it seems like it is going to tear, it probably is.
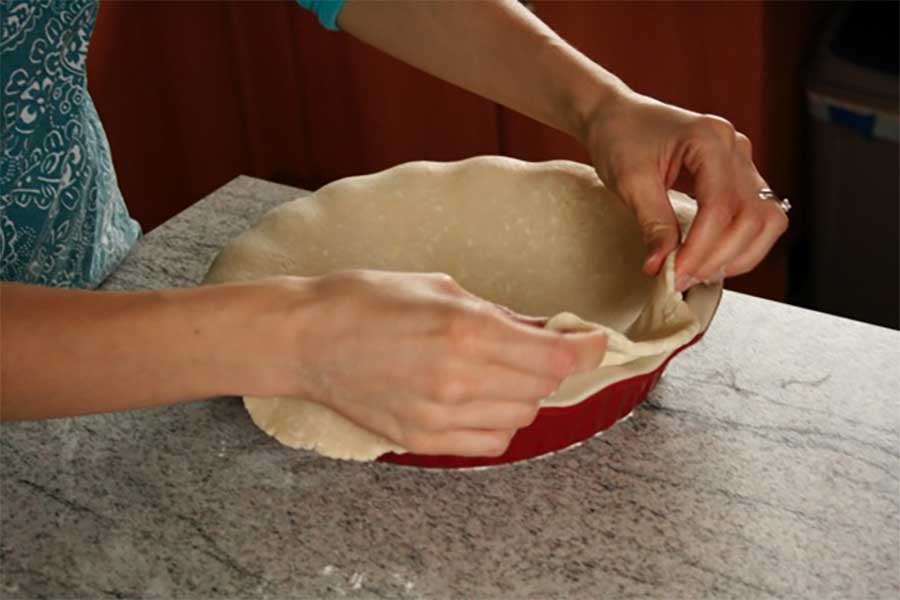
Once the pie dough is atop the pie plate, take the edges and gently drop them into the bottom and corners of the dish.
Then trim the edges.
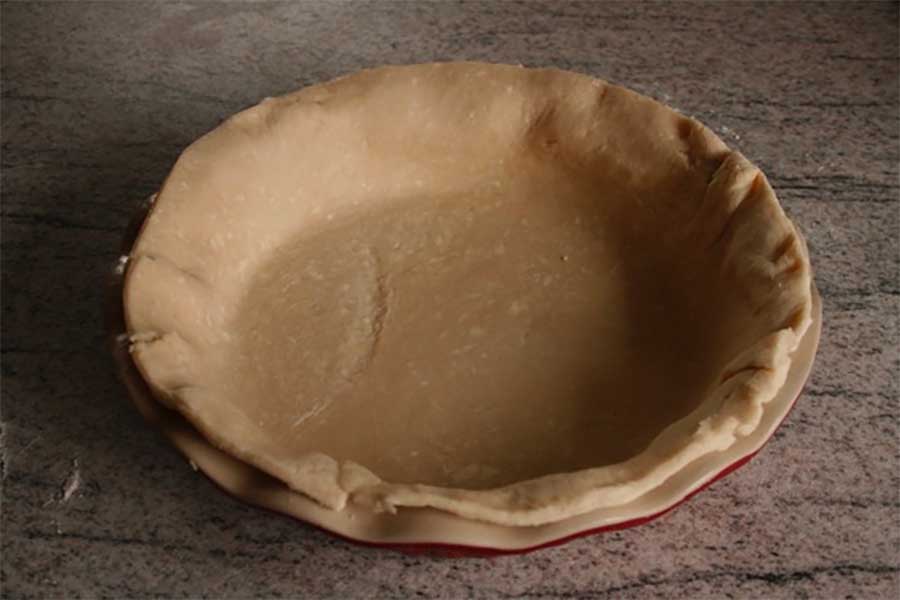
It’s not nearly perfect, but hey! This is homemade and it’s delicious.
I will take on your beautiful frozen store-bought pie crust any day with my ragged homemade one! Just sayin’…
Oh and that funny little curve marked into the dough- that’s my marble rolling pin. It’s a bit heavy on the dough.
I like it though. It’s pretty : )
Hopefully, you were able to take away some useful pie crust making knowledge from this tutorial.
If not, just remember-
Homemade crust is 1,000 times more delicious than store-bought, no matter the appearance
AND
fluting is always prettier than fork marks along with the crust!
Pie Crust
Click here to get printable version
Ingredients:
Double Crust
- 3 cups all-purpose flour
- ¼ cup of sugar
- 1½ tsp salt
- 2½ sticks very cold butter (10 oz), cut into cubes
- ⅓ cup cold shortening (frozen preferred), cut into 4 cubes
- about ½ cup very cold water
Single Crust
- 1½ cups all-purpose flour
- 2 Tb sugar
- ¾ tsp salt
- 1¼ sticks very cold butter (5 oz), cut into cubes
- 2½ Tb cold shortening (frozen preferred), cut into 4 cubes
- about ¼ cup very cold water
Directions:
Measure water into a liquid measuring cup and place in the freezer while preparing the remaining ingredients. Place cubes of butter and shortening into the fridge or freezer while preparing the dry mixture.
Dump flour, sugar, and salt into the bowl of a food processor and pulse about 6 times to evenly distribute.
Place butter and shortening cubes on top of flour mixture and pulse about 6 more times to combine. You should have a fairly shaggy, dry mixture with lumps the size of peas.
Using the feeding tube of the food processor, drizzle in the water while the machine is running. The dough should form a ball after about ½ cup liquid (for double crust) is added. STOP as soon as the pie dough begins to clump together. Test it by squeezing a piece of dough between your fist to see if it holds shape. If it crumbles, continue to add more water with the food processor running until it can hold shape.
Divide the dough into two if making a double batch. Shape into a ball and then flatten into a disc and wrap tightly in plastic wrap. Refrigerate at least 45 minutes before rolling out.