There’s something about making homemade glazed doughnuts that just feels right when the weather turns cool and everyone’s spending more time indoors. I first tried this recipe on a rainy afternoon when I wanted a project that was both hands-on and rewarding. Doughnuts are the kind of treat that bring people together, whether you’re sharing them at a weekend brunch, surprising your family on a weeknight, or just treating yourself after a long day. The process takes a bit of time, but most of it is waiting for the dough to rise, which gives you a chance to tidy up or prep your coffee for dunking later.
What I like about this recipe is how approachable it is, even if you’ve never worked with yeast before. The dough is forgiving, and you can adjust the flour if it feels too sticky. I’ve found that using whole milk and a touch of nutmeg gives the doughnuts a richer flavor, and the simple glaze is easy to customize if you want to experiment. If you’re looking for a way to make something special without needing fancy equipment, these doughnuts are a solid choice. You don’t need a stand mixer, but it does make things easier if you have one.
This recipe is perfect for sharing, but honestly, they’re just as good if you want to keep a few for yourself. I’ve brought these to potlucks and watched them disappear faster than anything else on the table. They’re also a great way to get kids involved in the kitchen—rolling out the dough and cutting shapes is fun for all ages. If you’re new to frying, don’t worry; the steps are straightforward, and I’ll share some tips to keep things safe and easy. Whether you’re planning a cozy gathering or just want a nostalgic snack, homemade glazed doughnuts are a satisfying project that pays off in warm, sweet bites.
A Taste of Inspiration: How to Make Homemade Glazed Doughnuts
Click here to get printable version
Time-Tested Ingredients, with a Twist
- 1 cup (240ml) whole milk, warmed to about 110°F (43°C)
- 2 1/4 teaspoons (7g) instant or active dry yeast (1 packet)
- 1/3 cup (65g) granulated sugar, divided
- 2 large eggs
- 6 tablespoons (85g) unsalted butter, melted and cooled slightly
- 1 teaspoon pure vanilla extract
- 1/4 teaspoon ground nutmeg
- 1/2 teaspoon salt
- 4 cups (500g) all-purpose flour, plus extra if needed
- 1–2 quarts vegetable oil for frying
- 2 cups (240g) powdered sugar, sifted
- 1/3 cup (80ml) heavy cream, half-and-half, or whole milk
- 1/2 teaspoon pure vanilla extract (for glaze)
The Process
- In a large bowl, combine the warm milk, yeast, and 1 tablespoon of the sugar. Stir and let it sit for 5 to 10 minutes until a frothy layer forms—this means your yeast is active.
- Add the rest of the sugar, eggs, melted butter, vanilla, nutmeg, salt, and 2 cups of flour. Mix on low speed or by hand until just combined, scraping down the sides as needed. Add the remaining flour and mix on medium speed until the dough starts to pull away from the bowl. If it’s too sticky, add extra flour a tablespoon at a time until it’s tacky but not dry.
- Knead the dough in your mixer for 5–7 minutes, or by hand on a floured surface for the same amount of time. The dough should feel soft and springy. If you poke it and it slowly bounces back, it’s ready.
- Lightly oil a large bowl, place the dough inside, and turn it to coat all sides. Cover and let it rise in a warm spot for 1.5 to 2 hours, until it doubles in size.
- Punch down the dough to release air. Turn it onto a floured surface and roll it out to about 1/2 inch thick. Cut out doughnuts with a 3 to 3.5-inch cutter, re-rolling scraps as needed. Place on parchment-lined trays, cover loosely, and let them rest for 30 minutes while you heat the oil.
- Heat vegetable oil in a heavy pot to 375°F (191°C). Fry 2–3 doughnuts at a time for about 1 minute per side, until golden brown. Use a slotted spoon to transfer to a cooling rack over a baking sheet. Keep the oil temperature steady for even cooking.
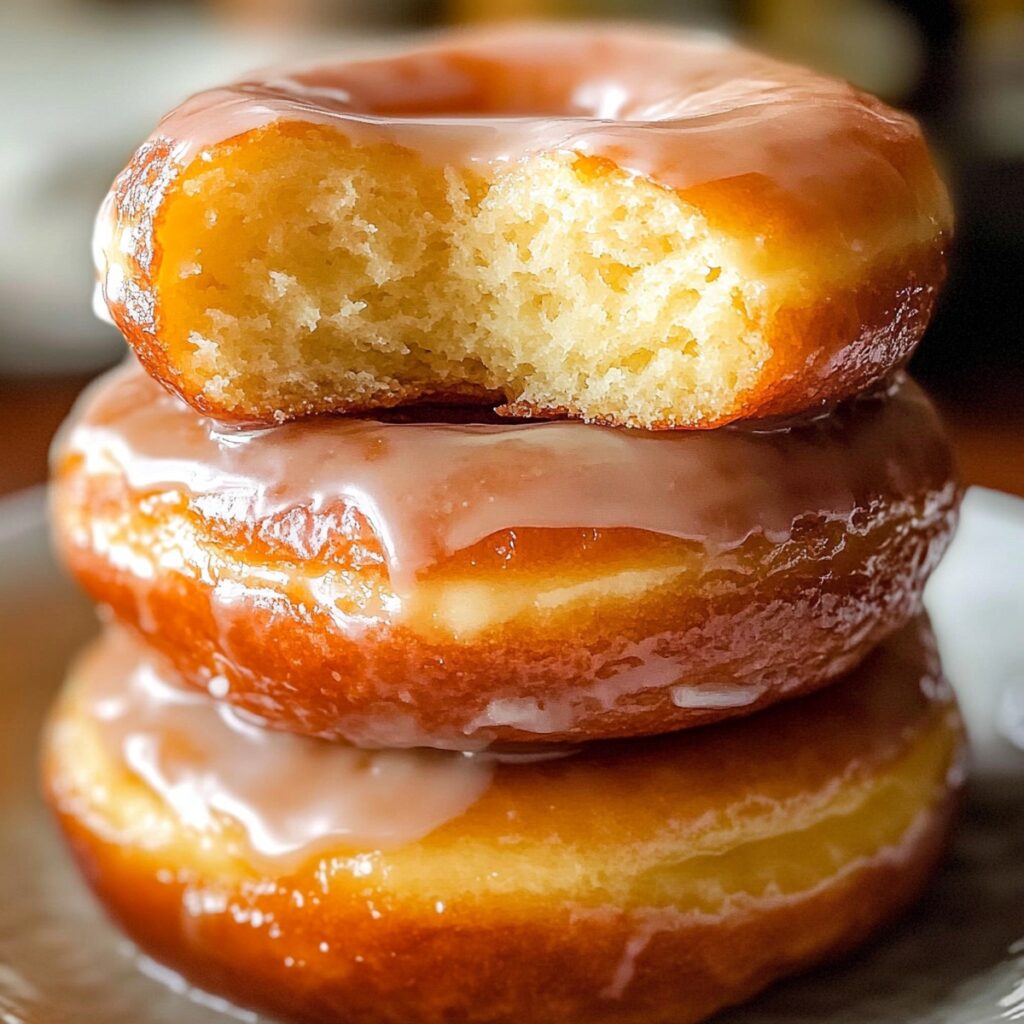
- For the glaze, whisk together powdered sugar, cream (or milk), and vanilla until smooth. Dip each warm doughnut into the glaze, coating both sides. Place back on the rack and let the glaze set for about 20 minutes.
Smart Ingredient Swaps (That Still Taste Great)
If you’re out of whole milk, you can use 2% milk or even a non-dairy alternative like oat milk for the dough. Unsalted butter is best, but margarine or plant-based butter works in a pinch. For the glaze, try swapping heavy cream with coconut milk for a subtle flavor twist. If you don’t have nutmeg, a pinch of cinnamon adds warmth. You can also use bread flour for a chewier texture, but add a tablespoon or two more liquid if needed. Always check consistency—dough should be tacky, not dry or overly sticky.
How to Plate It for Balance and Beauty
Arrange the glazed doughnuts on a wire rack set over a tray to catch any drips. For a more inviting look, stack a few at different angles or use a cake stand. If you’re serving at a gathering, line a basket with parchment and pile the doughnuts inside. Add a small bowl of extra glaze or fruit preserves on the side for dipping. For a seasonal touch, sprinkle a little grated orange zest or edible flowers on top just before serving. Serve while still slightly warm for the best texture and flavor.
Storage Tips to Preserve Nutrients
Homemade doughnuts are best eaten the day they’re made, but you can store leftovers in an airtight container at room temperature for up to two days. If you want to keep them longer, refrigerate for up to four days, but note that refrigeration can dry them out. To refresh, warm briefly in the microwave for 10–15 seconds. Avoid storing with strong-smelling foods, as doughnuts can absorb odors easily. Freezing is possible, but glaze after thawing for best results.
Cooking Techniques that Lock in Goodness
Getting the oil temperature right is key—use a thermometer and keep it at 375°F (191°C). If the oil is too cool, doughnuts absorb excess oil and turn greasy; too hot, and they brown before cooking through. Don’t overcrowd the pot; fry in small batches for even results. Letting the dough rise fully is crucial for a light, airy texture. When glazing, dip while warm so the glaze sets with a smooth finish.
Seasonal Superfoods You Can Add
For a seasonal boost, add a tablespoon of finely grated apple or pear to the dough for autumn, or fold in a handful of chopped strawberries in spring. You can also mix a teaspoon of ground flaxseed or chia into the dough for extra fiber. For the glaze, try whisking in a bit of matcha powder or beet juice for color and antioxidants. Adjust liquid amounts slightly if adding fruit to keep the dough workable.
Curious About This Recipe? Read On
Why does my dough sometimes not rise as much as expected?
This usually happens if the yeast is expired or the milk is too hot or too cold. Milk should be warm, not hot—about 110°F (43°C). If your kitchen is chilly, let the dough rise in the oven with just the light on. Also, make sure to give it enough time; under-proofed dough will be dense.
Can I bake these doughnuts instead of frying?
Yes, you can bake them, but the texture will be more like a soft bread roll than a classic doughnut. Bake at 375°F (191°C) for about 10–12 minutes, or until lightly golden. Brush with melted butter before glazing for a softer crust. The flavor is still great, but frying gives the signature doughnut texture.
How do I know when the dough is kneaded enough?
The dough should be smooth, elastic, and slightly tacky. If you stretch a small piece, it should form a thin “windowpane” without tearing. Under-kneaded dough will be dense and heavy, while over-kneaded dough can become tough. Aim for 5–7 minutes of kneading.
What’s the best way to keep the oil temperature steady?
Use a clip-on thermometer and adjust the heat as needed. Add doughnuts in small batches so the temperature doesn’t drop too much. Let the oil return to 375°F (191°C) between batches. If you don’t have a thermometer, test with a small piece of dough—it should sizzle and rise to the surface quickly.
Can I make the dough ahead of time?
Yes, you can make the dough the night before. After the first rise, cover tightly and refrigerate overnight. Let it come to room temperature and finish the second rise before shaping and frying. This can help develop more flavor and save time on the day you fry.
Why do my doughnuts sometimes come out greasy?
This usually means the oil wasn’t hot enough. Frying at the correct temperature (375°F/191°C) is crucial. If the oil is too cool, the doughnuts absorb oil instead of cooking quickly. Always preheat and monitor your oil, and avoid overcrowding the pot, which can lower the temperature.
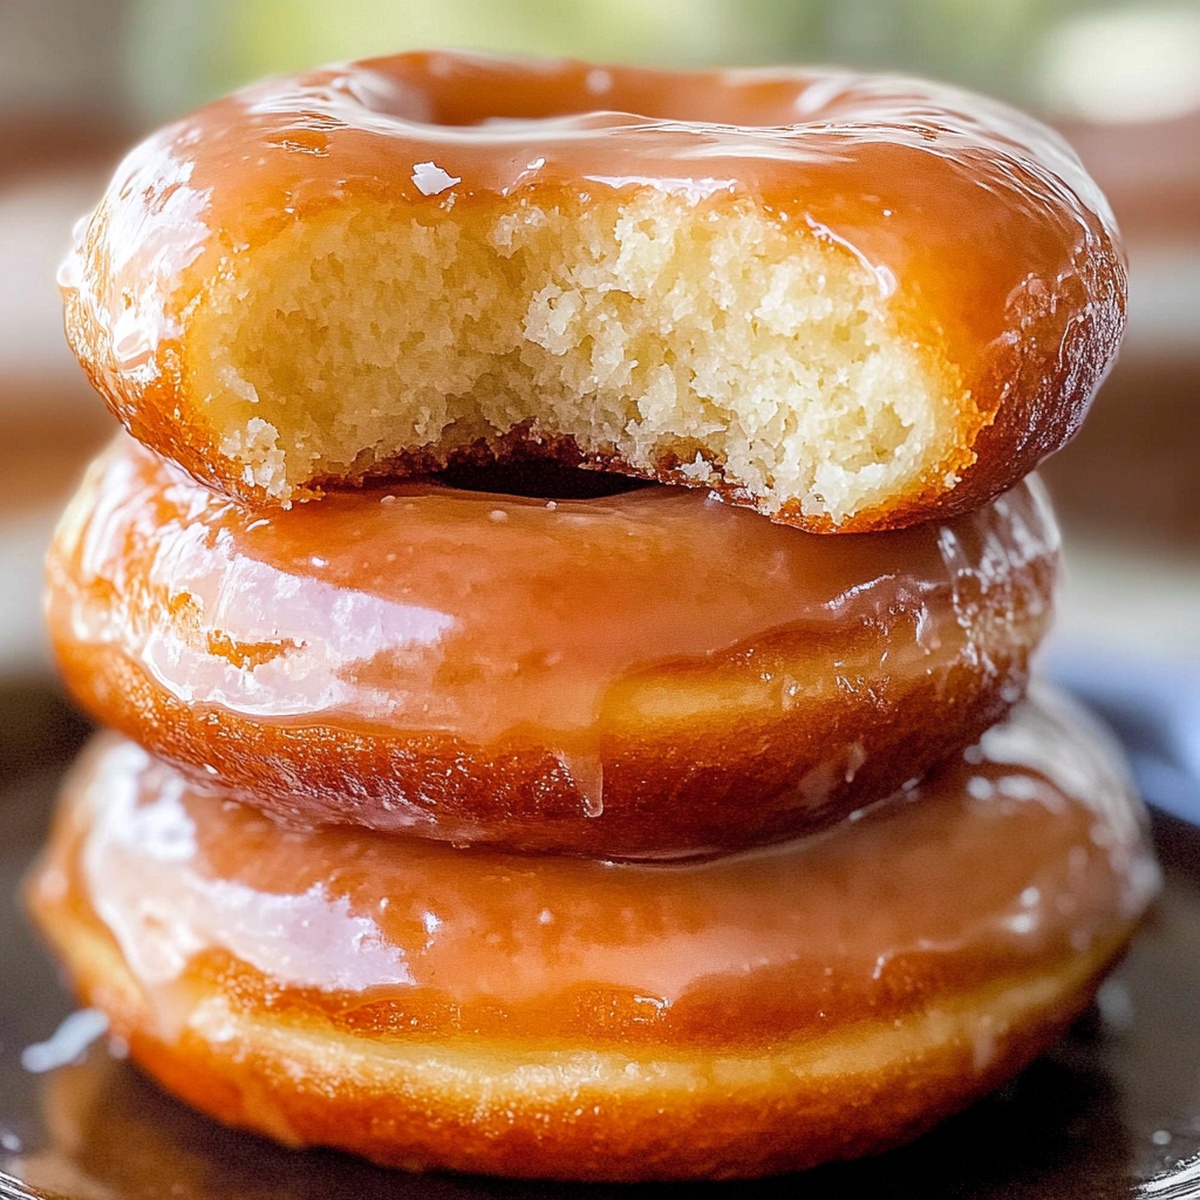
Homemade Glazed Doughnuts
Ingredients
For the Dough:
- 1 cup whole milk warmed to about 110°F (43°C)
- 2 1/4 teaspoons instant or active dry yeast (1 packet)
- 1/3 cup granulated sugar divided
- 2 large eggs
- 6 tablespoons unsalted butter melted and cooled slightly
- 1 teaspoon pure vanilla extract
- 1/4 teaspoon ground nutmeg
- 1/2 teaspoon salt
- 4 cups all-purpose flour plus extra if needed
For Frying and Glazing:
- 1–2 quarts vegetable oil for frying
- 2 cups powdered sugar sifted
- 1/3 cup heavy cream or half-and-half or whole milk
- 1/2 teaspoon pure vanilla extract
Instructions
For Dough Preparation:
- In a large mixing bowl, combine the warm milk, yeast, and 1 tablespoon of the sugar. Leave it covered for about 5 to 10 minutes until a frothy layer forms, indicating the yeast is activated.
- Next, incorporate the remaining sugar, eggs, melted butter, vanilla extract, nutmeg, salt, and 2 cups of flour. Mix at low speed for around a minute, scraping down the bowl sides. Gradually add the remaining flour and increase the speed to medium until the dough starts to detach from the bowl sides, which should take about 2 minutes. If the dough feels excessively sticky, add flour a tablespoon at a time until it reaches a tacky consistency.
- Knead the dough for 5 to 7 minutes, either using your mixer or by hand on a floured surface. If it clings, dust your hands or surface lightly with flour. The dough should be soft and springy; a gentle poke should show it bouncing back.
- Lightly grease a large bowl and place your dough inside, ensuring all sides are coated with oil. Cover the bowl and let the dough rise in a warm area for 1.5 to 2 hours, or until it has doubled in size.
- Once the dough has risen, gently punch it down to release the air. Transfer it to a floured surface and roll to approximately 1/2 inch thickness. Use a 3 to 3.5-inch doughnut cutter for shaping. Reroll the scraps if needed and set the cut doughnuts on parchment-lined trays. Cover lightly and let them rest for an additional 30 minutes while you heat the oil.
For Frying and Glazing:
- Heat vegetable oil in a deep pot to 375°F (191°C). Fry 2-3 doughnuts at a time for about 1 minute on each side until golden brown. Use a slotted spoon to move them to a cooling rack placed over a baking sheet, taking care to maintain the oil temperature and minimize splattering.
- For the glaze, whisk together powdered sugar, cream (or milk), and vanilla until fully combined and smooth. While the doughnuts are still warm, dip them into the glaze, ensuring both sides are well coated. Allow them to rest on the rack for about 20 minutes to let the glaze firm up.
