There is something quietly magical about assembling an icebox cake: the way simple pantry staples transform, under the patient hand of time, into a dessert that is both nostalgic and sophisticated. My Pistachio Icebox Cake is a testament to the art of effortless elegance in baking.
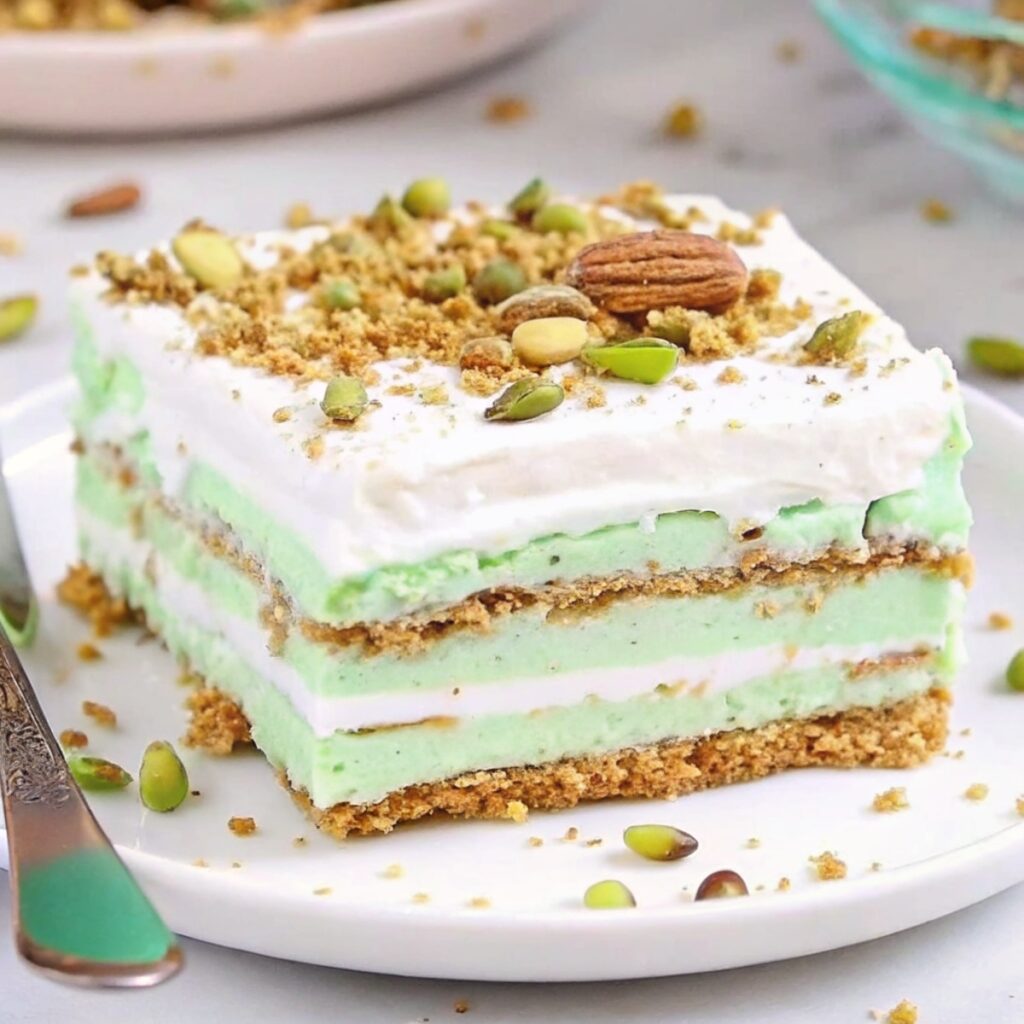
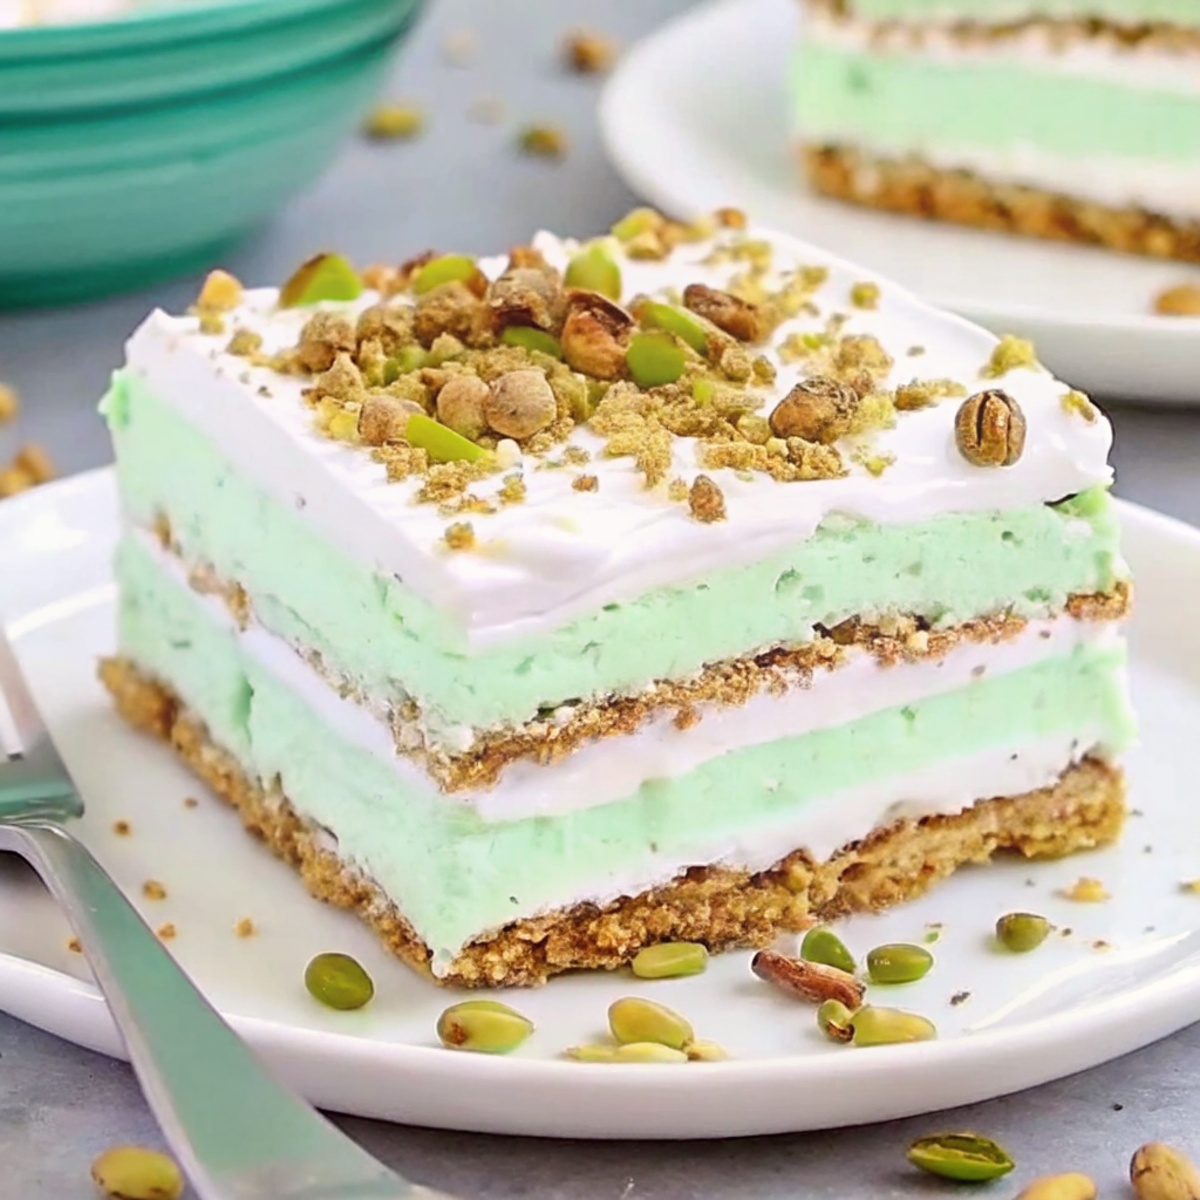
I still remember the first time I made this cake for a spring birthday gathering. The soft, pale green hue of pistachio pudding, the creamy drift of whipped topping, and those crisp sheets of graham cracker merging overnight into something wholly new—a slice so tender it yields under your fork, flecked with crunchy pistachio, cool and sweet on the tongue. It’s a dessert that evokes childhood delight, yet feels refined enough for even the most grown-up celebrations.
Baking, or in this case, assembling, is about honoring every step, no matter how simple. The joy is in the details: the precise layering of crackers, ensuring every corner is cozily filled; folding the whipped topping gently to preserve its pillowy texture; waiting for the refrigerator to work its magic as the flavors mingle and the structure softens to perfection. The aroma is subtle, sweet with a nutty whisper, while the finished cake dazzles with its pale green layers and the promise of creamy, dreamy bites.
For bakers, both new and seasoned, this recipe holds the promise of success. There’s nothing quite like the satisfaction of unveiling your chilled, beautifully set icebox cake and knowing you’ve created something wonderful—no oven required. So let’s embrace this easy, joyful dessert together. Here’s how to make the perfect Pistachio Icebox Cake, with every detail and technique to ensure it’s as stunning in your kitchen as it is in mine.
How to Bake the Perfect Pistachio Icebox Cake
Click here to get printable version
Baker’s Essentials: Tools & Ingredients (Measured Precisely)
- Tools:
- Large mixing bowl
- Whisk or electric mixer
- Rubber spatula
- 9×13-inch baking dish
- Offset spatula (optional, for smooth layers)
- Plastic wrap or foil (for covering)
- Ingredients:
- 2 packets (3.4 oz each) instant pistachio pudding mix and pie filling
- 2 2/3 cups whole milk
- 18 to 21 full graham cracker sheets
- 16 oz whipped topping, thawed and divided
- Chopped pistachios for garnish (optional)
The Baking Process: A Step-by-Step Guide
- In a large bowl, whisk together the pistachio pudding mixes and whole milk. Whisk thoroughly until the mixture is smooth and thickened—this should take about 2 minutes. Visual cue: The mixture should hold soft peaks and be free of lumps.
- Gently fold in 1 cup of the whipped topping using a rubber spatula. Mix until just combined; do not overmix—the goal is a light, creamy texture.
- Lay 6 to 7 full graham cracker sheets in a single layer on the bottom of a 9×13-inch baking dish, breaking them as needed to fit the corners and edges snugly.
- Spread half of the pistachio pudding mixture evenly over the crackers. Use an offset spatula for a smooth layer, spreading all the way to the edges.
- Add another layer of graham crackers on top of the pudding, followed by the remaining pudding mixture, spreading evenly.
- Finish with a final layer of graham crackers, pressing gently to settle them into the filling.
- Spread the remaining whipped topping evenly over the cake, creating soft swirls or a smooth finish as desired. Sprinkle with chopped pistachios for color and crunch (optional but recommended!).
- Cover the dish tightly with plastic wrap or foil. Refrigerate for at least 4 hours, but preferably overnight. Visual cue: The graham crackers should soften and the cake should slice cleanly.
- When ready to serve, cut into 12 to 15 squares and enjoy this cool, creamy treat!
Baking Science: Understanding Ingredient Swaps and Their Effects
The true beauty of an icebox cake is its adaptability. Don’t have whole milk? You can use 2% milk, but the filling will be slightly less rich and set a bit softer. If you’re dairy-free, try a creamy oat or almond milk, but ensure it’s unsweetened and thick for best results. No whipped topping on hand? Stabilized homemade whipped cream (whip heavy cream with a touch of powdered sugar and vanilla) works beautifully, though the cake will be slightly less sweet and may not hold up quite as long. For the graham crackers, chocolate or cinnamon-flavored varieties offer a unique twist—but remember, their texture will soften differently, so check for doneness before slicing.
Common Baking Blunders to Avoid for This Recipe
No-bake desserts are blessedly forgiving, but attention to detail ensures a flawless result. Be sure to use instant pudding mix—not cook-and-serve—as it thickens properly without heat. Avoid overmixing the pudding and whipped topping, which can deflate the mixture and make your cake dense. Layer graham crackers evenly to prevent gaps and uneven slices. Most crucially: don’t rush the chilling process. The magic happens when the crackers soften, melding into the creamy layers. Four hours is the minimum, but overnight is best for clean slices and harmonious flavor.
How to Glaze, Garnish, and Present Your Bake
Presentation brings this cake to life! Just before serving, scatter a generous handful of chopped pistachios over the top for a pop of color and crunch. For a festive look, drizzle with a little honey or a dusting of powdered sugar. If you’re feeling extra creative, pipe a few decorative swirls of whipped topping along the edges, or top with edible flowers for a springtime touch. Serve each slice on a chilled plate for maximum refreshment.
Keeping Your Pistachio Icebox Cake Fresh: Best Storage Methods
Proper storage keeps your icebox cake as luscious on day two as it was fresh from the fridge. Always cover the cake tightly with plastic wrap or foil to prevent the whipped topping from absorbing fridge odors and drying out. Store in the refrigerator and enjoy within 3 to 4 days for best texture—after that, the layers may become overly soft. For make-ahead convenience, the cake can be assembled up to 24 hours in advance, but avoid freezing, as the creamy layers may weep or separate upon thawing.
Seasonal Fruit & Spice Variations for Your Pistachio Icebox Cake
This cake welcomes creativity! In spring and summer, add a layer of fresh raspberries or sliced strawberries between the pudding and graham crackers for a burst of color and tartness. In winter, sprinkle a pinch of cardamom or cinnamon into the pudding for cozy warmth. Feeling adventurous? Fold in a handful of mini chocolate chips or swap the pistachios for chopped toasted almonds. Each small tweak brings new flavor notes while honoring the cake’s creamy, dreamy spirit.
Your Baking Questions, Answered by a Pro:
- Why is my icebox cake runny instead of set?
Most often, this happens if the pudding wasn’t whisked long enough, or if a non-instant pudding was used. Be sure to thoroughly mix the instant pudding with cold milk until it thickens before layering. - Can I substitute homemade whipped cream for whipped topping?
Yes! Simply whip heavy cream with a touch of powdered sugar until stiff peaks form. Note that homemade cream is less stable, so serve the cake within 24 hours for best texture. - What if I only have low-fat or plant-based milk?
You can use 2% or plant-based milk, but the filling may be a touch softer and less rich. For non-dairy milks, choose the thickest, creamiest option for best results. - How do I get clean, neat slices?
Chill the cake overnight for firm layers. Use a sharp knife dipped in hot water and wiped dry between cuts for crisp, tidy squares. - Can I add fruit or other mix-ins to the layers?
Absolutely! Thinly sliced berries or stone fruit, or even a layer of lemon curd, can be added between the crackers and pudding for extra flavor and color. - Why is chilling the cake so important?
This step allows the graham crackers to absorb moisture from the pudding and whipped topping, creating a soft, cake-like texture and melding all the flavors into perfect harmony.
Pistachio Icebox Cake
Ingredients
- 2 packets (3.4 oz each) instant pistachio pudding mix and pie filling
- 2 2/3 cups whole milk
- 18 to 21 full graham cracker sheets
- 16 oz thawed whipped topping divided
- chopped pistachios for garnish (optional)
Instructions
- In a large bowl, whisk together the pistachio pudding mixes and milk until the mixture is smooth and thick, using either a whisk or an electric mixer at medium speed.
- Gently incorporate 1 cup of the whipped topping into the pudding mix until everything is well combined and creamy.
- Arrange approximately 6 to 7 graham cracker sheets in one layer on the bottom of a 9x13-inch dish.
- Spread half of the pistachio pudding filling evenly over the graham cracker layer.
- On top of the pudding layer, add another layer of graham crackers, followed by the remaining pistachio pudding filling.
- Finish with a final layer of graham crackers on top.
- Cover the top of the cake with the remaining whipped topping and sprinkle on chopped pistachios for added texture if desired.
- Refrigerate the cake for at least 4 hours, or ideally overnight, allowing the flavors to meld together.
- When ready to serve, slice into 12 to 15 squares and enjoy this delightful treat!